Hey there! As a supplier of ceramic ball valves, I often get asked about how to replace the components of these valves. It's a crucial skill, whether you're a maintenance pro or just someone looking to do a bit of DIY work on your valves. In this blog, I'll walk you through the process step by step.
Why Replace Components?
First off, let's talk about why you might need to replace the components of a ceramic ball valve. Over time, wear and tear can take a toll on the valve. The ceramic ball, seats, seals, or other parts can get damaged, leading to leaks, reduced performance, or even complete failure. By replacing the worn - out components, you can extend the life of your valve and keep it working efficiently.

Tools You'll Need
Before you start the replacement process, gather the necessary tools. You'll typically need a set of wrenches, a screwdriver (both flat - head and Phillips, depending on the valve design), a seal puller (if removing old seals), and a clean cloth to wipe down the parts. Make sure you have the replacement components on hand as well. You can get these from us, as we offer a wide range of high - quality replacement parts for our ceramic ball valves.
Step 1: Shut Down the System
Safety first! Before you start working on the valve, shut down the system that the valve is a part of. This could be a water supply, a gas line, or an industrial process. Close the upstream and downstream valves to isolate the ceramic ball valve you're working on. Depressurize the system to prevent any accidental releases of fluid or gas.
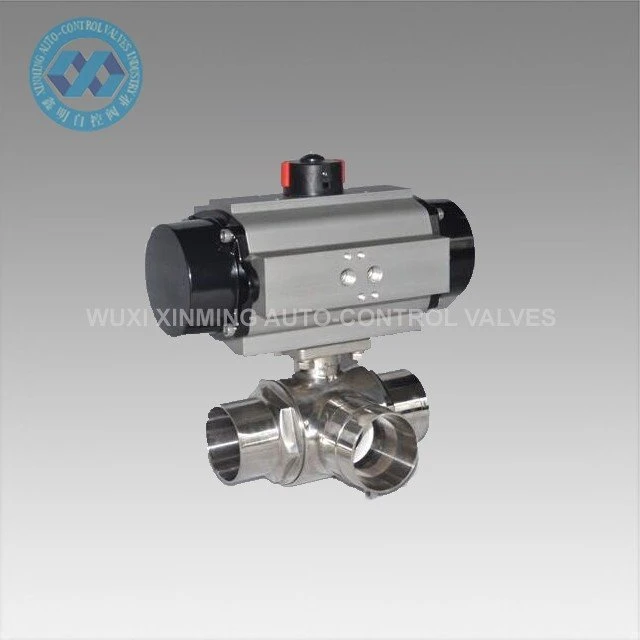
Step 2: Remove the Actuator (if applicable)
If your ceramic ball valve has an actuator, like in a Pneumatic threaded ball valve, you'll need to remove it first. Usually, actuators are attached with bolts or screws. Use your screwdriver or wrench to remove these fasteners and carefully take the actuator off the valve body. Set it aside in a safe place.
Step 3: Disassemble the Valve
Now it's time to take the valve apart. Start by removing the bonnet. The bonnet is usually held in place by bolts. Loosen these bolts using a wrench and lift the bonnet off. Be careful not to damage the gaskets or seals that are between the bonnet and the valve body.
Next, you can access the ball and the seats. In some valves, the ball is held in place by retainer rings or clips. Use your tools to remove these and lift the ball out. The seats are usually made of a soft material and can be removed using a seal puller or a flat - head screwdriver. Gently pry them out, being careful not to scratch the valve body.
Step 4: Inspect the Components
Once you've removed all the components, take a close look at them. Check the ceramic ball for any cracks, chips, or signs of wear. The seats should be smooth and free of damage. The seals should be in good condition without any tears or deformities. If any of the components are damaged, it's time to replace them with the new ones you have.
Step 5: Install the New Components
Start by installing the new seats. Make sure they fit properly into the valve body. Use a bit of lubricant to help them slide into place smoothly. Then, place the new ceramic ball into the valve body. Ensure that it rotates freely and is properly aligned.
Next, install the retainer rings or clips to hold the ball in place. Put the bonnet back on the valve body and tighten the bolts evenly. This will help ensure a proper seal.
Step 6: Re - attach the Actuator (if applicable)
If you removed an actuator earlier, now is the time to put it back on. Align it with the valve body and secure it using the bolts or screws you removed before. Make sure it's properly connected and functions correctly.
Step 7: Test the Valve
Once you've reassembled the valve, it's time to test it. Slowly open the upstream valve to pressurize the system. Check for any leaks around the valve body, bonnet, or actuator. Make sure the valve opens and closes smoothly. You can operate the valve a few times to ensure proper functionality.
Different Types of Ceramic Ball Valves
There are various types of ceramic ball valves, and the replacement process might vary slightly depending on the type. For example, a 3 Way Ball Valve has a more complex design with multiple ports. When replacing components in a 3 - way valve, you need to pay extra attention to the alignment of the ball and the seats to ensure proper flow control.
Another type is the Sanitary Ball Valve, which is commonly used in the food and beverage industry. These valves need to be disassembled and reassembled with extra care to maintain hygiene standards. The components should be cleaned thoroughly before installation.
Tips for a Successful Replacement
- Keep a clean workspace. Dirt and debris can cause problems when you're assembling the valve.
- Follow the manufacturer's instructions. Each valve might have specific requirements for disassembly and assembly.
- Take your time. Rushing through the process can lead to mistakes and improper installation.
Conclusion
Replacing the components of a ceramic ball valve isn't as difficult as it might seem. With the right tools, a bit of patience, and some basic knowledge, you can do it yourself. And if you need any replacement parts or have any questions, we're here to help. As a trusted supplier of ceramic ball valves, we offer high - quality products and excellent customer service. Whether you're dealing with a small - scale project or a large industrial application, we've got you covered.
If you're interested in purchasing ceramic ball valves or replacement components, feel free to reach out to us. We're more than happy to discuss your needs and provide you with the best solutions. Contact us today to start a conversation about your valve requirements.
References
- Valve Handbook, Various Authors
- Manufacturer's Manuals for Ceramic Ball Valves


