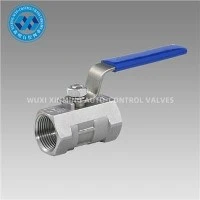
As a seasoned supplier of thin ball valves, I've witnessed firsthand the common issue of valve leakage and the challenges it poses to users. In this blog, I'll share practical steps on how to fix a leaking thin ball valve, drawing on my extensive experience in the industry.
Understanding the Thin Ball Valve
Before delving into the repair process, it's crucial to understand the basic structure and function of a thin ball valve. A thin ball valve consists of a ball with a hole in the center, which rotates within the valve body to control the flow of fluid. When the ball is aligned with the pipeline, the valve is open, allowing fluid to pass through. When the ball is rotated 90 degrees, the valve is closed, blocking the flow.
Identifying the Source of Leakage
The first step in fixing a leaking thin ball valve is to identify the source of the leakage. Leakage can occur at various points, including the valve stem, the valve seat, or the valve body. Here are some common signs to look for:
- External Leakage: If you notice fluid dripping or spraying from the outside of the valve, it's likely an external leakage. This could be due to a damaged valve packing or a loose valve bonnet.
- Internal Leakage: Internal leakage occurs when fluid passes through the valve even when it's closed. This could be caused by a worn valve seat, a damaged ball, or a misaligned valve stem.
- Leakage at the Connections: Leakage can also occur at the valve connections, such as the flanges or the threaded joints. This could be due to loose bolts, damaged gaskets, or improper installation.
Tools and Materials Needed
Once you've identified the source of the leakage, you'll need to gather the necessary tools and materials for the repair. Here's a list of common tools and materials you may need:
- Wrenches: Depending on the size and type of the valve, you may need a variety of wrenches, such as adjustable wrenches, socket wrenches, or pipe wrenches.
- Screwdrivers: You'll need a set of screwdrivers, including flathead and Phillips head screwdrivers, to remove the valve bonnet and other components.
- Sealants and Gaskets: To prevent future leakage, you'll need to use sealants and gaskets. Choose the appropriate sealant and gasket material based on the type of fluid and the operating conditions.
- Replacement Parts: If the valve seat, ball, or other components are damaged, you'll need to replace them. Make sure to use high-quality replacement parts that are compatible with your valve.
Step-by-Step Repair Process
Now that you have the necessary tools and materials, it's time to start the repair process. Here's a step-by-step guide on how to fix a leaking thin ball valve:


Step 1: Shut Off the Flow
Before you start working on the valve, make sure to shut off the flow of fluid to the valve. This will prevent any further leakage and ensure your safety.
Step 2: Depressurize the System
Once the flow is shut off, you'll need to depressurize the system. This can be done by opening a downstream valve or a bleed valve to release any remaining pressure in the pipeline.
Step 3: Remove the Valve Bonnet
Using a screwdriver or a wrench, remove the bolts or screws that hold the valve bonnet in place. Carefully lift the bonnet off the valve body, taking note of the orientation of the valve stem and the packing.
Step 4: Inspect the Valve Components
Inspect the valve seat, ball, and other components for damage or wear. Look for signs of corrosion, scratches, or cracks. If any components are damaged, replace them with new ones.
Step 5: Replace the Valve Packing
If the valve packing is damaged or worn, replace it with a new one. Make sure to use the correct type and size of packing for your valve. Apply a small amount of lubricant to the packing to make it easier to install.
Step 6: Reassemble the Valve
Once you've replaced the damaged components and the valve packing, it's time to reassemble the valve. Carefully place the bonnet back on the valve body and tighten the bolts or screws. Make sure the valve stem is properly aligned and the packing is compressed evenly.
Step 7: Test the Valve
After reassembling the valve, test it to make sure it's working properly. Slowly open the upstream valve and check for any leakage. If there's no leakage, the valve is fixed. If there's still leakage, repeat the repair process or consult a professional.
Preventive Maintenance
To prevent future leakage, it's important to perform regular preventive maintenance on your thin ball valves. Here are some tips:
- Inspect the Valves Regularly: Check the valves for signs of damage, wear, or leakage on a regular basis. This will help you identify any potential problems before they become serious.
- Lubricate the Valve Components: Apply a small amount of lubricant to the valve stem and other moving parts to prevent corrosion and wear.
- Replace the Valve Packing Periodically: Over time, the valve packing can wear out and lose its effectiveness. Replace the packing periodically to ensure a tight seal.
- Follow the Manufacturer's Instructions: Always follow the manufacturer's instructions for installation, operation, and maintenance of your thin ball valves. This will help you ensure the valves are working properly and prevent any damage or leakage.
Conclusion
Fixing a leaking thin ball valve can be a challenging task, but with the right tools, materials, and knowledge, it can be done safely and effectively. By following the steps outlined in this blog, you'll be able to identify the source of the leakage, repair the valve, and prevent future problems.
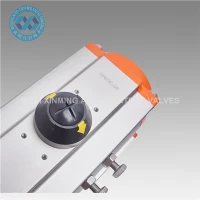
If you're in the market for high-quality thin ball valves or need assistance with valve repair and maintenance, we're here to help. We offer a wide range of Flange Ball Valve, Pneumatic Ball Valve For High Temperature Media, and Wholesale Stainless Steel Ss304 3 Way Pneumatic Flange Ball Valve to meet your specific needs. Contact us today to discuss your requirements and get a quote.
References
- "Valve Handbook" by William L. Nayfeh
- "Piping and Pipeline Engineering: Design, Construction, Maintenance, and Integrity Management" by George A. Antaki