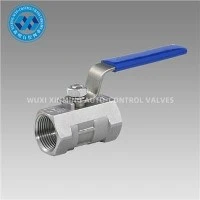
As a supplier of 220V solenoid valves, I often receive inquiries from customers about the installation process. Installing a 220V solenoid valve might seem daunting at first, but with the right guidance and precautions, it can be a relatively straightforward task. In this blog post, I'll walk you through the step - by - step process of installing a 220V solenoid valve, ensuring that you can complete the job safely and effectively.
Step 1: Preparation
Before you start the installation, it's crucial to gather all the necessary tools and materials. You'll need a wrench set, a screwdriver, electrical tape, a multimeter for testing electrical connections, and of course, the 220V solenoid valve itself. You can find a high - quality 220V Solenoid Valve from our wide range of products.
Inspect the valve carefully for any visible damage during transit. Check the valve's specifications to ensure it is suitable for your intended application. This includes the flow rate, pressure rating, and the type of fluid or gas it is designed to control.
Make sure you have access to a 220V power source. If the power source is not nearby, you may need to install an appropriate electrical conduit and wiring to reach the valve location. It is also essential to turn off the power supply at the main breaker to avoid any electrical hazards during the installation process.
Step 2: Mounting the Solenoid Valve
The first physical step in the installation is to mount the solenoid valve in the desired location. The valve should be installed in a clean, dry, and well - ventilated area. Avoid areas with excessive vibration or high - temperature environments, as these can affect the valve's performance and lifespan.
Determine the correct orientation of the valve. Most solenoid valves have an arrow indicating the direction of flow. Make sure this arrow aligns with the flow direction of the fluid or gas in your system.
Use the appropriate mounting brackets or flanges provided with the valve to secure it in place. Tighten the mounting bolts or screws evenly to ensure a stable installation. If you are mounting the valve on a pipe, ensure that the pipe is clean and free of any debris or rust that could interfere with the valve's seal.
Step 3: Connecting the Piping
Once the valve is mounted, it's time to connect the piping. First, clean the ends of the pipes that will be connected to the valve. Remove any burrs or rough edges using a file or sandpaper. This will help create a better seal and prevent leaks.
Apply a suitable pipe sealant or thread tape to the male threads of the pipes. Wrap the tape in the direction of the threads to ensure a proper seal. Connect the pipes to the valve's inlet and outlet ports. Use a wrench to tighten the connections, but be careful not to over - tighten, as this can damage the valve or the pipes.
After connecting the pipes, check for any visible gaps or misalignments. You can perform a preliminary leak test by applying a small amount of soapy water to the connections and looking for bubbles. If bubbles appear, tighten the connections further until the leak stops.
Step 4: Electrical Connection
Connecting the electrical wires is a critical step in the installation process. Before making any electrical connections, double - check that the power is still turned off at the main breaker.
Identify the power supply wires (usually live, neutral, and ground). The 220V solenoid valve typically has terminals for these connections. Strip the ends of the wires to expose a sufficient length of bare conductor.
Connect the live wire to the appropriate terminal on the valve. The live wire is usually colored brown or red, depending on the electrical code in your region. Connect the neutral wire (usually blue) to the corresponding terminal. Finally, connect the ground wire (usually green or yellow) to the grounding terminal on the valve.
Use electrical tape to insulate the connections and prevent any short - circuits. After making the connections, gently tug on the wires to ensure they are securely attached.
Step 5: Testing the Solenoid Valve
Once all the connections are made, it's time to test the solenoid valve. Turn on the power supply at the main breaker. Use a multimeter to check if the correct voltage is reaching the valve. The voltage should be within the specified range for the valve.
Activate the valve using the control system. This could be a manual switch, a timer, or an automated control system. Observe the valve's operation. You should hear a clicking sound as the valve opens and closes. Check for any leaks around the valve and the piping connections.
If the valve does not operate correctly, check the electrical connections first. Make sure the wires are properly connected and there are no loose connections. You can also check the valve's coil for continuity using a multimeter. If the coil is damaged, it may need to be replaced.


Step 6: Final Checks and Commissioning
After testing the valve, perform a final inspection of the entire installation. Check all the connections, both electrical and piping, to ensure they are secure. Look for any signs of damage or wear that may have occurred during the installation process.
If the valve is part of a larger system, test the system's overall performance. Make sure the valve is controlling the flow of fluid or gas as expected. Monitor the system for a period of time to ensure stable operation.
Conclusion
Installing a 220V solenoid valve requires careful planning, proper tools, and attention to detail. By following these steps, you can ensure a successful installation and reliable operation of the valve.
At our company, we offer a wide range of high - quality solenoid valves, including the Wholesale Precision Flow Control Pneumatic Solenoid Valve With Accessories and the Pneumatic Air Control Solenoid Valve Fast Response Type. Our valves are designed to meet the highest standards of quality and performance.
If you have any questions about the installation process or are interested in purchasing a 220V solenoid valve, please feel free to contact us for further discussion and procurement negotiation. We are committed to providing you with the best products and services to meet your needs.
References
- "Solenoid Valve Handbook" by Emerson Industrial Automation
- Various industry standards and guidelines for electrical and piping installations.