Installing a limit switch box on lifting equipment is a crucial task that ensures the safety and proper operation of the machinery. As a reliable limit switch box supplier, I am here to guide you through the process step by step. In this blog post, I will share detailed instructions on how to install a limit switch box on lifting equipment, along with some important considerations and tips.
Understanding the Basics of Limit Switch Boxes
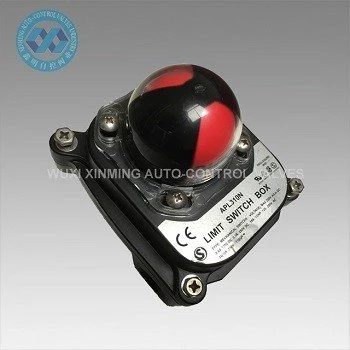
Before we dive into the installation process, it's essential to understand what a limit switch box is and how it works. A limit switch box is a device that is used to control the movement of lifting equipment by detecting the position of the load or the equipment itself. It consists of a switch mechanism that is activated when a specific limit is reached, such as the maximum or minimum height of the lift. This helps prevent over-travel, which can lead to equipment damage, accidents, and injuries.
There are different types of limit switch boxes available in the market, each designed for specific applications. Some common types include APL312 Limit Switch Box and APL210 Limit Switch Box. These limit switch boxes are known for their reliability, durability, and precision, making them ideal for use in various lifting equipment.
Tools and Materials Required
Before you start the installation process, you will need to gather the necessary tools and materials. Here is a list of items you will typically need:
- Limit switch box (choose the appropriate model based on your lifting equipment requirements)
- Screwdriver set
- Wrench set
- Electrical tape
- Wire strippers
- Drill and drill bits (if required for mounting)
- Mounting brackets or hardware
- Electrical cables or wires
Step-by-Step Installation Guide
Step 1: Prepare the Lifting Equipment
The first step is to prepare the lifting equipment for the installation of the limit switch box. This involves ensuring that the equipment is turned off and that all power sources are disconnected. You should also clean the area where the limit switch box will be installed to remove any dirt, debris, or grease.

Step 2: Determine the Mounting Location
Next, you need to determine the best location for mounting the limit switch box. The mounting location should be easily accessible and should allow for proper operation of the switch mechanism. It should also be protected from any potential damage, such as impact or vibration.
When choosing the mounting location, consider the following factors:
- The movement path of the lifting equipment
- The position of the load or the equipment itself
- The accessibility for maintenance and adjustment
- The protection from environmental factors, such as dust, moisture, and temperature
Step 3: Mount the Limit Switch Box
Once you have determined the mounting location, you can proceed to mount the limit switch box. Depending on the type of limit switch box and the lifting equipment, you may need to use mounting brackets or hardware to secure the box in place.
Here are the general steps for mounting the limit switch box:
- Position the limit switch box at the chosen mounting location.
- Align the mounting holes on the box with the holes on the lifting equipment or the mounting brackets.
- Insert the screws or bolts through the holes and tighten them securely using a screwdriver or a wrench.
- Make sure the limit switch box is firmly attached and does not move or vibrate during operation.
Step 4: Connect the Electrical Wires
After mounting the limit switch box, you need to connect the electrical wires. This involves connecting the power supply wires, the control wires, and the signal wires to the appropriate terminals on the switch box.
Here are the general steps for connecting the electrical wires:
- Identify the power supply wires, the control wires, and the signal wires.
- Strip the insulation from the ends of the wires using wire strippers.
- Connect the power supply wires to the appropriate power terminals on the switch box. Make sure to follow the wiring diagram provided by the manufacturer.
- Connect the control wires to the control terminals on the switch box. These wires are used to control the operation of the limit switch.
- Connect the signal wires to the signal terminals on the switch box. These wires are used to transmit the signal from the limit switch to the control system.
- Use electrical tape to secure the connections and prevent any short circuits.
Step 5: Adjust the Limit Switch
Once the electrical wires are connected, you need to adjust the limit switch to ensure that it operates correctly. This involves setting the switch to the desired limit position, such as the maximum or minimum height of the lift.
Here are the general steps for adjusting the limit switch:
- Turn on the power supply to the lifting equipment.
- Slowly operate the lifting equipment to the desired limit position.
- Adjust the limit switch by turning the adjustment screw or knob until the switch is activated at the correct position.
- Test the limit switch by operating the lifting equipment to the limit position several times. Make sure the switch is activated consistently and that the equipment stops at the desired position.
Step 6: Test the System
After adjusting the limit switch, you need to test the system to ensure that it is working properly. This involves operating the lifting equipment through its full range of motion and checking that the limit switch is activated at the correct positions.
Here are the general steps for testing the system:
- Turn on the power supply to the lifting equipment.
- Operate the lifting equipment through its full range of motion, including the maximum and minimum height positions.
- Check that the limit switch is activated at the correct positions and that the equipment stops immediately when the switch is activated.
- If the limit switch does not operate correctly, check the wiring connections, the adjustment settings, and the switch mechanism for any faults or damage.
Important Considerations and Tips
- Safety First: Always follow the safety guidelines and procedures when installing and operating the limit switch box. Make sure to wear appropriate personal protective equipment (PPE), such as gloves and safety glasses.
- Read the Manual: Before starting the installation process, carefully read the installation manual provided by the manufacturer. The manual contains important information and instructions on how to install, adjust, and maintain the limit switch box.
- Choose the Right Model: Select the appropriate limit switch box model based on the specifications and requirements of your lifting equipment. Consider factors such as the load capacity, the operating environment, and the type of control system.
- Proper Wiring: Ensure that the electrical wiring is properly connected and insulated to prevent any short circuits or electrical hazards. Follow the wiring diagram provided by the manufacturer and use the correct gauge of wire.
- Regular Maintenance: Perform regular maintenance on the limit switch box to ensure its proper operation and longevity. This includes cleaning the switch mechanism, checking the wiring connections, and lubricating the moving parts.
Contact Us for Purchase and Consultation
If you are looking for a high-quality limit switch box for your lifting equipment, we are here to help. As a leading limit switch box supplier, we offer a wide range of products, including APL312 Limit Switch Box, APL210 Limit Switch Box, and Valve Position Indicator. Our products are known for their reliability, durability, and precision, and we provide excellent customer service and technical support.
Whether you need assistance with product selection, installation, or maintenance, our team of experts is ready to help. Contact us today to discuss your requirements and to get a quote for your limit switch box purchase. We look forward to working with you to ensure the safety and efficiency of your lifting equipment.
References
- Manufacturer's Installation Manuals
- Industry Standards and Guidelines for Lifting Equipment Safety


