Hey there! I'm a supplier of soft - seal ball valves, and today I'm gonna walk you through how to install a soft - seal ball valve. Whether you're a DIY enthusiast or a professional plumber, this guide will help you get the job done right.

Before You Start
First things first, you gotta gather all the tools and materials you'll need. You'll need a wrench, pipe cutter, Teflon tape, and of course, the soft - seal ball valve itself. Make sure the valve you've got is the right size and type for your application. You don't want to end up with a valve that's too big or too small for your pipes.
Also, it's super important to turn off the water supply before you start the installation. You don't want to get soaked or cause a flood in your place. Once you've shut off the water, open a faucet to relieve the pressure in the pipes.
Preparing the Pipes
Now, let's talk about preparing the pipes. If the pipes are old or rusty, you might need to clean them up a bit. Use a wire brush to remove any rust or debris from the ends of the pipes. This will ensure a good seal between the valve and the pipes.
Next, measure and cut the pipes to the right length. Use a pipe cutter to make a clean, straight cut. Make sure the cut is perpendicular to the pipe, or else the valve might not fit properly. After cutting the pipes, use a deburring tool to remove any burrs or sharp edges from the inside and outside of the pipes.
Applying Teflon Tape
Teflon tape is your best friend when it comes to creating a watertight seal. Wrap the Teflon tape around the male threads of the pipe in a clockwise direction. Make sure you wrap it tightly and evenly, but don't go overboard. You only need about 3 - 4 wraps of the tape. This will help prevent leaks and make it easier to screw the valve onto the pipes.
Installing the Soft - Seal Ball Valve
Now it's time to install the valve. Take the valve and align it with the pipes. Make sure the valve is in the open position before you start screwing it on. This will prevent any debris from getting trapped inside the valve.
Use a wrench to tighten the valve onto the pipes. Start by hand - tightening the valve, and then use the wrench to give it a final, firm tightening. But be careful not to over - tighten the valve, as this can damage the threads or the valve itself.
Testing the Installation
Once you've installed the valve, it's time to test it. Turn the water supply back on slowly and check for any leaks around the valve. If you see any leaks, try tightening the valve a little more. If the leak persists, you might need to remove the valve, add more Teflon tape, and reinstall it.
Open and close the valve a few times to make sure it's working smoothly. If the valve is hard to turn or doesn't open and close fully, there might be an issue with the installation. Check to make sure the valve is properly aligned and tightened.
Different Types of Soft - Seal Ball Valves
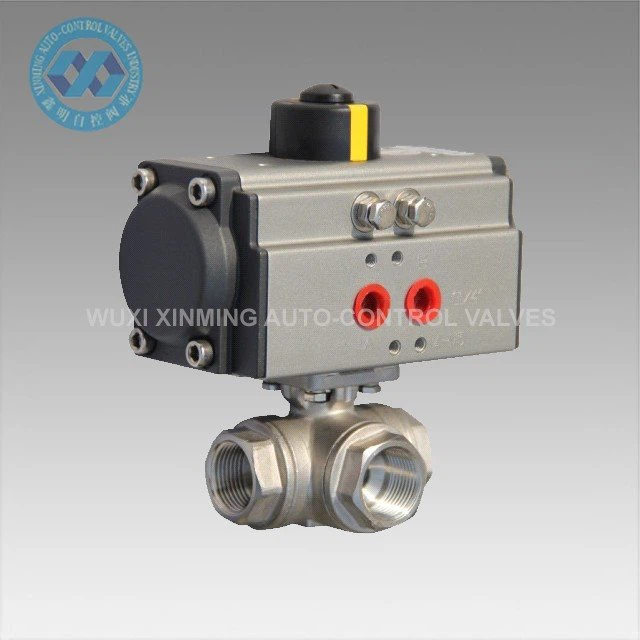
There are different types of soft - seal ball valves available in the market, and the installation process might vary slightly depending on the type. For example, if you're using a 3 Piece Pneumatic Thread Ball Valve, the installation might involve some additional steps related to the pneumatic actuator.
The Double Acting Plastic Pneumatic Actuator Ball Valve also has its own unique features. When installing this type of valve, you need to pay special attention to the actuator's connection and wiring.
And then there's the Pneumatic Ball Valve. This valve is widely used in industrial applications, and the installation process might require more technical knowledge. Make sure you follow the manufacturer's instructions carefully when installing these types of valves.
Troubleshooting
Sometimes, things don't go as planned during the installation. Here are some common issues and how to fix them:
- Leaking valve: As mentioned earlier, if the valve is leaking, try tightening it a bit more. If that doesn't work, remove the valve, add more Teflon tape, and reinstall it.
- Valve won't turn: If the valve is hard to turn, it could be because of debris inside the valve or improper installation. Try cleaning the valve and making sure it's properly aligned.
- Actuator issues: If you're using a pneumatic valve with an actuator and the actuator isn't working properly, check the air supply, the wiring, and the connections. Make sure everything is properly connected and there are no blockages.
Maintenance Tips
Once you've installed the soft - seal ball valve, it's important to maintain it properly. Here are some tips:
- Regularly check for leaks: Periodically check the valve for any signs of leakage. If you notice a leak, fix it as soon as possible to prevent further damage.
- Lubricate the valve: If the valve has moving parts, lubricate them regularly to ensure smooth operation. Use a lubricant recommended by the manufacturer.
- Keep the valve clean: Remove any dirt or debris from the valve to prevent blockages and damage.
Conclusion
Installing a soft - seal ball valve isn't that difficult if you follow the right steps. By gathering the right tools, preparing the pipes, and following the installation process carefully, you can have a properly installed valve in no time.
If you're in the market for a high - quality soft - seal ball valve or any of the related products like the 3 Piece Pneumatic Thread Ball Valve, Double Acting Plastic Pneumatic Actuator Ball Valve, or Pneumatic Ball Valve, feel free to reach out for a purchase negotiation. We're here to help you find the perfect valve for your needs.
References
- Plumbing Handbook for Residential and Commercial Installations
- Soft - Seal Ball Valve Manufacturer's Manuals


