Hey there! I'm a supplier of Vacuum Ball Valves, and I'm stoked to share with you the ins and outs of correctly installing a vacuum ball valve. Whether you're a DIY enthusiast or a professional in the field, getting this installation right is crucial for the smooth operation of your system. So, let's dive in!
Pre-Installation Checks
Before you even start unpacking that shiny new vacuum ball valve, there are a few things you need to do. First off, inspect the valve thoroughly. Check for any visible damage, like cracks or dents, on the body, stem, or ball. If you spot any issues, don't install it right away. Reach out to your supplier (that's me!) to see about getting a replacement.
Next, make sure you've got all the necessary tools on hand. You'll typically need a wrench, some thread sealant, and maybe a pair of pliers. Having everything ready will save you a bunch of time and hassle later on.
Also, take a good look at the installation site. Measure the pipe size to ensure it matches the valve's connection size. You don't want to end up with a valve that's either too big or too small for your pipes. And check the pipe for any debris or obstructions. A clean pipe will make for a better seal and a more efficient valve operation.
Choosing the Right Location
Picking the right spot to install your vacuum ball valve is super important. It needs to be easily accessible for maintenance and operation. You don't want to hide it away in a corner where you'll have a hard time getting to it when you need to make adjustments or perform repairs.
Also, consider the flow direction. Vacuum ball valves are designed to work in a specific flow direction, which is usually indicated by an arrow on the valve body. Make sure you install it so that the flow goes in the correct direction. Installing it backwards can lead to poor performance and even damage the valve over time.
Another thing to think about is the environment. Avoid installing the valve in areas that are prone to extreme temperatures, high humidity, or exposure to chemicals. These conditions can degrade the valve's materials and shorten its lifespan.
Preparing the Pipes
Once you've found the perfect spot for your valve, it's time to prep the pipes. Start by cleaning the pipe ends. Use a wire brush or sandpaper to remove any rust, dirt, or old sealant. A clean surface will help create a tight seal between the valve and the pipes.
If your pipes have threaded connections, apply a thin layer of thread sealant to the male threads. This will prevent leaks and make the connection more secure. Just be careful not to use too much sealant, as it can get into the valve and cause problems.


For pipes with flanged connections, make sure the flange faces are clean and flat. Check the gasket to ensure it's in good condition and the right size for your flanges. Place the gasket between the flanges and align the bolt holes.
Installing the Vacuum Ball Valve
Now comes the fun part - installing the valve! If you're working with threaded connections, carefully thread the valve onto the pipe. Use a wrench to tighten it, but don't overdo it. Over-tightening can damage the threads and cause leaks. A good rule of thumb is to tighten the valve until it's snug, and then give it a quarter-turn more.
For flanged connections, insert the bolts through the aligned holes in the flanges and valve. Use a wrench to tighten the nuts evenly. Start with the bolts on opposite sides and work your way around the flange. This will ensure that the valve is properly aligned and the gasket is compressed evenly.
Once the valve is installed, double-check the alignment and make sure it's sitting straight. Any misalignment can put stress on the valve and lead to premature failure.
Connecting the Actuator (if applicable)
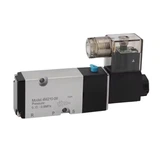
If your vacuum ball valve comes with an actuator, like a Pneumatic Stainless Steel 304 316 Ball Valve or a Pneumatic Actuated Three-Way Stainless Steel Ball Valve, you'll need to connect it properly. Follow the manufacturer's instructions carefully.
First, make sure the actuator is compatible with the valve. Check the mounting dimensions and the type of connection. Most actuators are mounted on top of the valve using bolts or a mounting bracket.
Connect the air or hydraulic lines to the actuator. Use the appropriate fittings and make sure they're tightened securely. Leaks in the actuator lines can cause the valve to malfunction.
Once the actuator is connected, test it to make sure it's working properly. Open and close the valve a few times to check the operation. If you notice any issues, like slow movement or uneven opening and closing, check the connections and the actuator settings.
Testing the Installation
After you've installed the valve and connected the actuator (if applicable), it's time to test the system. First, close the valve and apply vacuum to the system. Check for any leaks around the valve connections, actuator, or pipes. You can use a leak detector or a soapy water solution to check for leaks. If you see bubbles forming, there's a leak. Tighten the connections or replace the gasket as needed.
Next, open the valve and check the flow. Make sure the valve opens and closes smoothly and that the flow is consistent. If you notice any issues, like restricted flow or a noisy operation, there could be a problem with the valve or the installation.
Maintenance Tips
To keep your vacuum ball valve working in top condition, regular maintenance is key. Here are a few tips:
- Lubrication: If your valve requires lubrication, follow the manufacturer's recommendations. Use the right type of lubricant and apply it at the recommended intervals.
- Inspection: Periodically inspect the valve for any signs of wear or damage. Check the seals, gaskets, and actuator for any leaks or malfunctions.
- Cleaning: Keep the valve clean and free of debris. If the valve is exposed to dirty or corrosive environments, clean it more frequently.
Conclusion
Installing a vacuum ball valve correctly is essential for the proper functioning of your system. By following these steps and tips, you can ensure a successful installation and a long-lasting valve. If you have any questions or need more information, don't hesitate to reach out. As a Vacuum Ball Valve supplier, I'm here to help you with all your valve needs. Whether you're looking for a Wholesale Stainless Steel Control Check Valve Ball Valve or any other type of valve, I've got you covered.
If you're interested in purchasing our high-quality vacuum ball valves or need further advice on installation and maintenance, feel free to start a conversation with us. We're eager to assist you in finding the perfect valve solutions for your projects.
References
- Valve Installation Manuals
- Industry Standards for Valve Installation and Maintenance