A ball valve is a crucial component in many industrial and domestic settings, used to control the flow of liquids and gases. Regular cleaning of ball valves is essential to ensure their optimal performance, longevity, and reliability. As a leading ball valve supplier, we understand the importance of proper maintenance, and in this blog, we'll guide you through the process of cleaning a ball valve.
Understanding the Ball Valve
Before you start cleaning, it's important to have a basic understanding of how a ball valve works. A typical ball valve consists of a valve body, a ball with a hole in the middle, a stem, and seats. The ball rotates within the valve body to either allow or block the flow of fluid. When the hole in the ball aligns with the flow path, the valve is open; when it's perpendicular, the valve is closed.
Tools and Materials Needed
- Safety equipment: Gloves, safety glasses, and a respirator if working in a potentially hazardous environment.
- Cleaning agents: Depending on the type of contaminants, you may need mild detergents, solvents, or specialized valve cleaning solutions.
- Cleaning tools: Soft brushes, rags, and toothpicks for hard-to-reach areas.
- Lubricant: A suitable valve lubricant to ensure smooth operation after cleaning.
Step-by-Step Cleaning Process
Step 1: Preparation
- Isolate the valve: Before starting any cleaning work, make sure to isolate the ball valve from the system. This involves shutting off the flow of fluid to the valve and relieving any pressure in the pipeline.
- Drain the valve: Open the valve and allow any remaining fluid to drain out completely. This will prevent spills and make the cleaning process easier.
Step 2: Disassembly
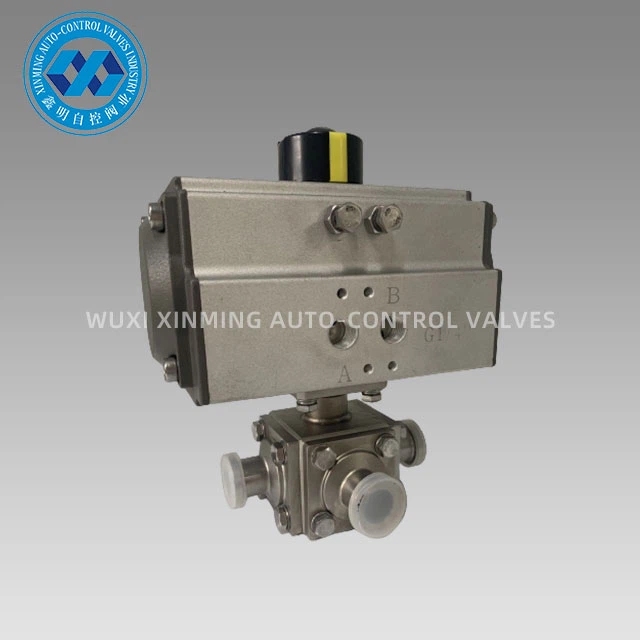
- Remove the actuator: If the ball valve is equipped with an actuator, such as a High Quality Three-way Pneumatic Ball Valve, carefully disconnect it from the valve stem. Follow the manufacturer's instructions for proper disassembly.
- Unscrew the valve body: Use the appropriate tools to unscrew the bolts or nuts holding the valve body together. Be careful not to damage the gasket or other components during this process.
- Remove the ball and seats: Once the valve body is open, gently remove the ball and the seats. Take note of their orientation and placement for reassembly.
Step 3: Cleaning the Components
- Inspect the components: Before cleaning, inspect the ball, seats, and valve body for any signs of damage, wear, or corrosion. If any parts are severely damaged, they may need to be replaced.
- Clean the valve body: Use a soft brush and a suitable cleaning agent to remove any dirt, debris, or buildup from the inside of the valve body. Pay special attention to the areas where the ball and seats come into contact.
- Clean the ball and seats: Immerse the ball and seats in a cleaning solution and use a soft brush to remove any contaminants. For stubborn deposits, you may need to soak the parts for a longer period of time.
- Rinse the components: After cleaning, rinse all the components thoroughly with clean water to remove any remaining cleaning agent.
Step 4: Drying and Lubrication
- Dry the components: Use a clean, dry rag to wipe the components dry. Make sure there is no moisture left on the parts before reassembly.
- Lubricate the components: Apply a thin layer of valve lubricant to the ball, seats, and other moving parts. This will help reduce friction and ensure smooth operation.
Step 5: Reassembly
- Insert the seats: Carefully insert the seats back into the valve body, making sure they are properly aligned.
- Insert the ball: Place the ball into the valve body and rotate it to ensure it moves freely.
- Reattach the valve body: Align the two halves of the valve body and tighten the bolts or nuts evenly. Be careful not to overtighten, as this can damage the gasket.
- Reattach the actuator: If applicable, reattach the actuator to the valve stem and make sure it is properly adjusted.
Step 6: Testing
- Open and close the valve: Once the valve is reassembled, open and close it several times to check for smooth operation.
- Check for leaks: Inspect the valve for any signs of leaks around the valve body, connections, or actuator. If any leaks are detected, tighten the connections or replace the gasket as needed.
Special Considerations for Different Types of Ball Valves
- Pneumatic Actuator Tri-clamp Three Way Ball Valve: These valves are commonly used in sanitary applications. When cleaning, make sure to use cleaning agents that are compatible with the materials used in the valve. Pay special attention to the tri-clamp connections, as they need to be kept clean and free of debris to ensure a proper seal. Learn more about Pneumatic Actuator Tri-clamp Three Way Ball Valve
- Segment Control Valve With Pneumatic Actuator: These valves are designed for precise flow control. When cleaning, make sure to clean the segment and the seats thoroughly to ensure accurate control. Check the actuator for proper operation and calibration after cleaning. Explore Segment Control Valve With Pneumatic Actuator
Maintenance Tips for Long-Term Performance
- Regular inspection: Conduct regular inspections of your ball valves to detect any signs of wear, damage, or leakage early.
- Proper storage: If you need to store ball valves for an extended period of time, make sure to store them in a clean, dry environment. Protect them from dust, moisture, and other contaminants.
- Follow the manufacturer's guidelines: Always follow the manufacturer's instructions for installation, operation, and maintenance of your ball valves. This will help ensure optimal performance and longevity.
Conclusion
Cleaning a ball valve is a relatively simple process that can significantly extend the life of your valve and ensure its reliable operation. By following the steps outlined in this blog and taking proper maintenance measures, you can keep your ball valves in top condition. As a trusted ball valve supplier, we offer a wide range of high-quality ball valves to meet your specific needs. If you have any questions or need assistance with valve selection, installation, or maintenance, please don't hesitate to contact us for procurement and further discussions.

References
- Valve Handbook, 4th Edition, by William L. Nayfeh
- Industrial Valves: Design and Application, by Robert W. McKetta


