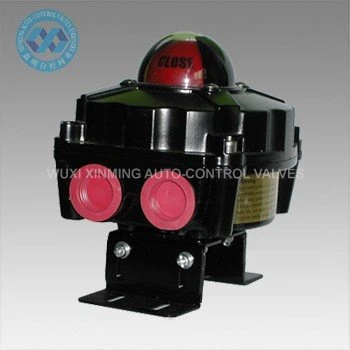
A limit switch is a crucial component in a limit switch box, serving as a safety and control mechanism in various industrial applications. When a limit switch becomes damaged, it can lead to malfunctions, safety risks, and operational inefficiencies. As a trusted limit switch box supplier, I understand the importance of providing clear guidance on how to replace a damaged limit switch. In this blog post, I'll walk you through the step-by-step process to ensure a smooth and successful replacement.
Step 1: Safety First
Before you begin any work on the limit switch box, it's essential to prioritize safety. Ensure that the power to the equipment is completely shut off. This prevents the risk of electric shock and any unexpected movement of the machinery. Use lockout/tagout procedures to secure the power source and clearly indicate that maintenance is in progress. Wear appropriate personal protective equipment (PPE), such as safety glasses, gloves, and protective clothing, to safeguard yourself from potential hazards.
Step 2: Gather the Necessary Tools and Materials
To replace the damaged limit switch, you'll need a few tools and materials. Here's a list of what you should have on hand:
- Screwdriver set (both flathead and Phillips)
- Wrench set
- Multimeter for testing electrical connections
- Replacement limit switch (make sure it's the correct model and specifications for your limit switch box)
- Electrical tape
- Wire connectors
Step 3: Identify the Damaged Limit Switch
Open the limit switch box carefully. Take note of the internal layout and the position of the limit switches. Look for any visible signs of damage, such as broken wires, burnt components, or physical deformation. If you're unsure which switch is damaged, you can use a multimeter to test the continuity of each switch. A damaged switch will typically show no continuity or inconsistent readings.
Step 4: Disconnect the Electrical Connections
Once you've identified the damaged limit switch, it's time to disconnect the electrical connections. Use a screwdriver to loosen the terminal screws that hold the wires in place. Gently pull the wires out of the terminals. Make sure to label each wire clearly to ensure proper reconnection later. You can use small pieces of tape or wire markers to mark the wires according to their corresponding terminals.
Step 5: Remove the Mounting Screws
The limit switch is usually mounted to the inside of the limit switch box using screws. Use a screwdriver to remove these screws. Keep the screws in a safe place to avoid losing them. Once the screws are removed, carefully lift the damaged limit switch out of the box.
Step 6: Install the New Limit Switch
Take the new limit switch and place it in the same position where the damaged switch was located. Align the mounting holes of the new switch with the holes in the box. Insert the mounting screws and tighten them securely using a screwdriver. Make sure the switch is firmly attached to the box to prevent any movement during operation.
Step 7: Reconnect the Electrical Wires
Refer to the labels you made earlier to reconnect the electrical wires to the new limit switch. Insert each wire into its corresponding terminal and tighten the terminal screws using a screwdriver. Ensure that the connections are tight and secure to prevent any loose connections that could cause electrical problems.
Step 8: Test the New Limit Switch
Before closing the limit switch box, it's important to test the new limit switch to ensure it's working properly. Reconnect the power to the equipment and use a multimeter to test the continuity of the switch. Activate the switch manually and check if the multimeter shows the expected readings. If the switch is working correctly, you should see a change in the continuity or voltage readings.
Step 9: Close the Limit Switch Box
Once you've confirmed that the new limit switch is working properly, carefully close the limit switch box. Make sure the box is sealed tightly to prevent dust, moisture, or other contaminants from entering. Use the screws to secure the box cover in place.
Step 10: Conduct a Final Check
After closing the box, perform a final check of the entire system. Power on the equipment and observe its operation. Check if the limit switch is functioning as expected and if the equipment is operating safely and efficiently. If you notice any issues or abnormalities, immediately shut off the power and recheck your work.
Additional Considerations
- Compatibility: When choosing a replacement limit switch, make sure it's compatible with your limit switch box and the specific application. Consider factors such as voltage, current rating, and contact configuration.
- Maintenance: Regular maintenance of the limit switch box can help prevent premature damage to the limit switches. Inspect the switches periodically for any signs of wear or damage and replace them as needed.
- Upgrades: If you're experiencing frequent problems with your limit switches, you may want to consider upgrading to a higher-quality or more advanced model. Our company offers a wide range of Explosion-proof Limit Switch Box, Valve Position Indicator, and ISO 5211 Mechanical Limit Switch For Pneumatic Valves that are designed to provide reliable performance and long service life.
Conclusion
Replacing a damaged limit switch in a limit switch box is a relatively straightforward process if you follow the proper steps and take the necessary safety precautions. By understanding how to replace the switch yourself, you can save time and money on maintenance costs. If you have any questions or need further assistance with limit switch replacement or any other limit switch box-related issues, don't hesitate to contact us. We're here to provide you with the best products and support for your industrial needs. Whether you're looking for a simple replacement part or a complete limit switch box solution, we have the expertise and inventory to meet your requirements. Reach out to us today to start a discussion about your specific needs and explore how we can help you optimize your operations.

References
- Electrical Safety Standards Handbook
- Limit Switch Manufacturer's Installation and Maintenance Guide


